
Mods To Download
|
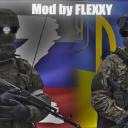
Russian v Ukraine A Russian v Ukraine mod by FLEXXY Fight a modern battle between Russia and Ukraine |
|
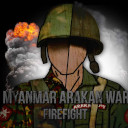
Myanmar Army vs Arakan Army: Civil War Mod by MRS Studio A revolutionary civil war between the Myanmar Government Forces and the Revolutionary Army. |
|
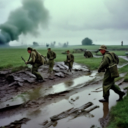
Cold War A Cold War mod by Teschner Fight as either the US or USSR, with custom maps included too |
|
Russia v Ukraine A Russia v Ukraine mod by GAMAS Fight a modern battle between Russia and Ukraine |
|
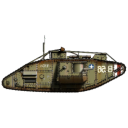
WW1 A World War One mod by Adusta The beginning of tanks. Use your Mark Vs to destroy the enemy A7Vs! |
|
Gangfight Gangfight by Crimeknower Fight as either the Crips or the Bloods, drive Audis and Bugattis and spray lead at your enemies with Uzis and AKs. |
|
Russian Special Forces Russian Special Forces by RSF Mod about Russian special forces who fight terrorism and crime, 2000-2020. |
|
Mixed Mod Mixed Mod by MNRL |
|
ROA vs UPA ROA vs UPA by Antigravity and Senk |
How to install a mod
Click on a mod to download it, unzip it, and move the contents to the following folder, which you will need to create:
Windows
move the unzipped Mod folder to either:
a) C:\Users\<your username>\AppData\Roaming\Sean OConnors Games\Firefight\Mod\
b) the folder you have the Firefight.exe file installed to
Android
move the unzipped Mod folder to either:
a) /Download/Firefight/Mod/
b) /Data/com.windowsgames.firefight/files/Mod/
c) assets/Mod folder if you have unpacked the .apk file
For options a) and b) you will also need to go into Settings | Apps | Firefight | Permissions and enable 'Access storage'
iOS
unfortunately Apple don't allow any easy way to install mods
How to create a mod
When Firefight starts up it looks to see if there is a file called mod.txt in the above Mod folder. If it finds it the game will switch to 'mod mode' and will first look for any graphics, sound and data files within that Mod folder - if they are laid out in the same folder structure as in the game itself. It will read in mod.txt and use that for game settings such as which nationalities are in use and which equipment files they will use, how many credits are available, what years the mod is set in, etc...
To create a mod, download the Data Editor for Windows. Run it and click on Mod | Mod Mode in the menu.
This will create the Mod folder in your user folder and the mod.txt file there. You can make changes in the dialog boxes and add your own graphics and sounds in the Mod\Images and Mod\Sounds folder (which must correspond to the same folder structure as in the game's folders). Click on OK in the Edit Mod Settings dialog box and then run Firefight.
The structure of mod.txt
mod.txt is laid out in an HTML like way with tags and closing tags. Comments start with a //. The basic structure is (with each tag set within <mod> being optional, and if omitted the game default will be used):
<mod>
	<name></name>
	<author></author>
	<show_scenarios></show_scenarios>
	<years></years>
	<credits></credits>
	<text_colours></text_colours>
	<nationality></nationality>
</mod>
<name>
Not used by the game, but a way to identify the name of your mod
<author>
Not used by the game, but a way to identify it's your mod
<show_scenarios>
If you are running a mod the default is to not show the 8 scenarios (as your mod may not be set in WW2). If you want the scenarios to be shown add:
<show_scenarios>yes</show_scenarios><allow_vehicles>
<allow_infantry>
<allow_at_guns>
<allow_artillery>
If you don't want to have any of a certain class of squads in your mod set any of these entries to 'no'
<allow_vehicles>no</allow_vehicles><minimum_commonness>
If you don't want the enemy AI to choose rare units set this tag's value to the lowest 'commonness' you want for units that it can choose
<minimum_commonness>5</minimum_commonness><minimum_commonness_to_upgrade>
If the AI has credits left over after its initial purchases it can upgrade some to better ones. Use this setting to prevent it upgrading to not very common unit types
<minimum_commonness_to_upgrade>50</minimum_commonness_to_upgrade><choose_unique_rifle_squad>
The default is for the AI to choose a single rifle squad type and only use that. Set this to 'no' and it will choose random ones
<choose_unique_rifle_squad>no</choose_unique_rifle_squad><years>
Used to tell the game which year options to show to the player. Only a maximum of eight options will be shown. eg:
	<years>
		<start>1950</start>
		<end>1990</end>
		<increment>10</increment>
	</years>
<credits>
Used to tell the game the four credit options to show to the player. eg:
	<credits>
		<attack1>100</attack1>
		<attack2>200</attack2>
		<attack3>300</attack3>
		<attack4>400</attack4>
		<defend1>80</defend1>
		<defend2>160</defend2>
		<defend3>240</defend3>
		<defend4>320</defend4>
	</credits>
<text_colours>
Used to tell the game what text colours to use. eg:
	<text_colours>
		<map_description>C6BD94</map_description>
		<custom_heading>C6BD94</custom_heading>
		<custom_option>FFFFFF</custom_option>
		<custom_unit_description>FFFFFF</custom_unit_description>
		<game>C6BD94</game>
		<friend>58A5F3</friend>
		<enemy>FD8177</enemy>
	</text_colours>
<nationality>
Used to tell the game which nationality options the game will show. Use one <nationality></nationality> set for each option you want to allow the player to be able to choose from. If you omit any entries from one of the built-in nationalities, the game will use the default data that goes with whatever nationality you have chosen in <name></name>
	<nationality>
		<name>American WW2</name>
		<surnames>surnames_american.txt</surnames>

		<flags>
			<static>flag_USA_WW2.png</static>
			<animated>flag_animated_USA.png</animated>
		</flags>

		<equipment>equipment_american_WW2.txt</equipment>

		<voice>US</voice>

		<ranks>
			<1>Pvt</1>
			<2>PFC</2>
			<3>Cpl</3>
			<4>Sgt</4>
			<5>2Lt</5>
			<6>1Lt</6>
			<7>Cpt</7>
		</ranks>

		<default_images>
			<tank_crew>uniform_game_american_tank_crew.png</tank_crew>
			<infantry>uniform_game_american.png</infantry>
			<tank_crew_profile>uniform_profile_american_tank_crew.png</tank_crew_profile>
			<infantry_profile>uniform_profile_american.png</infantry_profile>
			<ranks>uniform_ranks_american.png</ranks>
		</default_images>

	</nationality>
<nationality><flags>
You can use any of the built-in flags for either the static (used in the Custom Game screen) or animated (used in the game itself), or if you specify a modded one make sure you place your modded PNG flag image in the Mod/Chooser/Custom Game/Flags (for static ones) and Mod/Images/Game/Flags (for animated ones) folders
<nationality><equipment>
You can specify multiple <equipment> files, so you could for example specify the built-in 'equipment_american_WW2.txt' and then an additional equipment file for any of your extra modded squads
<nationality><voice>
Built-in voices are US (American), UK (English), FR (French), RU (Russian), DE (German), IT (Italian), JP (Japanese), AR (Arabic), CN (Chinese), HU (Hungarian), IL (Hebrew), PL (Polish), RO (Romanian), UA (Ukrainian). The game uses that two letter code to look in the Sounds/Voices folder for the correct voice file, and then find the correct voice_XX_ file to play. If you create your own language choose a two letter abbreviation and put your .ogg sound files in /Mod/Sounds/Voices/XX/voice_XX_xxxxxx.ogg etc...
Download a tutorial mod